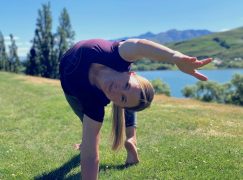
10 Ways Yoga Straps Can Deepen Your Practice
Props are for students who can’t do the “full pose “, right? Wrong! Rather than being training wheels for beginners to rely on, yoga props can deepen our practice in unexpected ways. The addition of a prop to a familiar pose can completely change our experience; rather than falling back on our old habits, the prop can highlight new areas for focus. Rather than being just a stepping stone for new students, smart use of props can refine our practice. But don’t take my word for it; try these ten tips to see how the simple addition of a yoga strap can change your practice for the better.
1. Shoulder Circles
This is a fantastic shoulder warm-up, perfect to use early in practice to open your chest for better range of motion and deeper breathing. It’s also excellent preparation for overhead stretches (like Urdhva Dhanurasana or Wheel) and overhead binds.
Try it: Find a comfortable upright seat. Measure a length of strap from your nose to one hand and hold with between both hands in front of you. With your inhalation circle the strap overhead, lengthening your grip, if required, to allow both shoulders to glide through simultaneously. On your exhalation, take the strap behind you, feeling a stretch across your chest and shoulders. Next inhalation bring the strap overhead again, and exhale to guide it back down in front of you. Take 10-12 shoulder circles, feeling increasing warmth and fluidity with every round.
2. Side Bends
One of the most potent benefits of a physical yoga practice is reminding our bodies of their full range of motion. We so seldom side-bend in daily life; this exercise is useful to re-awaken both strength and ease in our side body, allowing us to deepen our breath and move more freely into side-bending and rotated poses as well as overhead binds.
Try it: From your comfortable seat, with your strap still between your hands, take your arms overhead. As you next inhale, reach up and over to the right, feeling the entire left side of the body fan open, and as you exhale engage your left side body to come back to center. On your next breath in swap sides, flowing side to side for 10-12 breaths and noticing how both your strength and your ease of motion increase with each cycle.
3. Abdominals
Whether we love abdominal work, or love to hate it, there’s no question how important abdominal engagement is to our yoga practice. Adding a strap to supine abdominal work is a fool-proof way to learn how to engage rectus abdominis (your “six pack ” muscles) to fine-tune the position of the spine and pelvis. It’s especially beneficial for students like me, who need help learning how to support a deep lumbar curve. It is my favourite preparation for Adho Mukha Vrksasana or Handstand, where without strong core engagement we would have the tendency to collapse into a banana shape.
Try it: Lie down on your back with your strap on the floor behind your waist. Catch one end of the strap with one hand but leave the other end loose. Draw your navel toward your spine, pressing your low back down onto the strap and pinning it to the floor. Maintain downward pressure on the strap so that you’re unable to pull it out from beneath you, then lift your right knee above your hip, shin parallel to the floor. Without letting your strap move, swap legs midair to lift your left knee. Continue to flow side to side for around 60 seconds without allowing the strap to slip, then return your feet to the floor to rest for a few deep belly breaths. If you’re ready for more of a challenge in your second set, keep the downward pressure on the strap and extend the lifted leg out to hover above the floor. Keep your neck and shoulders relaxed,but feel the powerful engagement of your abdominals supporting your low back.
4. Boat Variation
This variation of Navasana takes the pressure of your hip flexors, giving you space to notice the powerful relationship between the strength in your legs and the lift of your core. It works well as part of a warm-up, so that you’re able to tap into that potent connection throughout practice.
Try it: Come to a seat, taking your strap under your armpits and around your back at bra strap or heart rate monitor height. Make a long enough loop that you can hook the ball of your right foot with little or no bend in your knee. Cinch your belly, as if you’ve tied a string around your waist and drawn it tight. Shift forward to the front edge of your sit bones and lift your left leg, bringing your left foot into the loop of the strap beside your right. Notice that the more you press through your legs, the more you’re able to lift out of your low back. Hold for 8-10 slow breaths before bending your knees to return your feet to the floor. Rest for a few belly breaths before repeating with the left leg leading.
5. Angel Wings
No matter how mindfully we move through our yoga practice, it’s what we do the rest of the day – in other words, our posture – that really impacts our physical health. This “anti-slump ” strapping technique helps us learn healthier postural patterns by anchoring our shoulders back and down to broaden our chest.
Try it: Thread the strap around your back just under your armpits, then loop the ends of the strap forward over the fronts of your shoulders to drape down behind you again. Cross the two ends of the strap over your upper back in an X-shape, then bring the long ends back under your armpits to lock in place just below your sternum.
Tightening the strap pulls your shoulders back and down, immediately resetting your posture from slumping to upright. Try wearing your angel wings for a couple of hours of your day, or through your standing yoga practice, and observe your breathing, energy and mood to see what a difference balanced posture makes.
6. Pyramid Hip Hinge
Our aim in Parsvottanasana or Pyramid is to hinge at the hips, lengthening both the front line of the torso and the hamstrings on the back of the front leg. Eventually we may round the spine to fold over the legs, but we need the movement to initiate at the hips. For many of us, hinging at the hips is challenging and instead we tend to round our back and collapse our chest. Using a strap can help us find the anterior pelvic tilt required by the pose, as well as engaging the posterior shoulder and mid back to keep our chest open.
Try it: Stand with your right foot forward and left foot about 3 feet back, toes turned slightly out so that you can ground your left heel. Hold the strap across the front of your pelvis just below your frontal hip bones, adjusting the length of the strap so that with your arms a couple of inches from your sides, the strap pulls taut. Keep the weight even between both feet and slowly hinge forward at your hips. Draw your hands back to help lift and lengthen your chest. Feel how the strap helps you to balance the forward lift of your chest and the backward pull of your sit bones and hands. Stay for 8-10 breaths before slowly rising up to repeat with left foot forward.
7. Warrior 3 variation
Virabhadrasana III is one of the most powerful standing balance poses, and great way to learn to access the power in our legs. But while many of us are able to feel the strength in our standing leg, we can struggle to engage the lifted leg. The resistance of the strap allows us to experience the pose with vigour in both legs.
Try it: Stand upright with the strap between your hands and a long loop grazing the floor. Step your right foot forward through the strap and hook the ball of your left foot in the loop. Adjust the length of the strap so that, with your arms a couple of inches from your sides, the strap pulls taut. Shift your weight into your right leg and hinge forward at your hips to float your left leg. Draw the heads of your shoulders away from the floor, feeling your posterior shoulders and back awaken. Find balance between the resistance of your left foot, the pull of your hands, and the opposing length through your crown. Notice the stability you feel when you’re fully engaged in the pose. Stay for 5-7 breaths before slowly releasing to repeat on the other side.
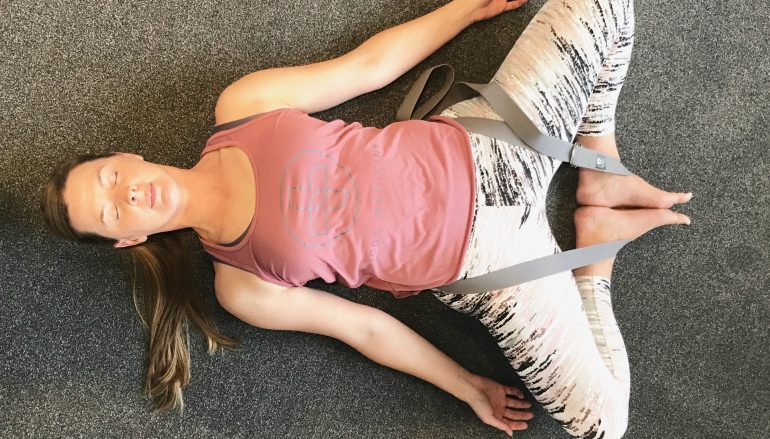
8. Sleeping Butterfly
Supta Baddha Konasana or Supine Bound Angle Pose is one my favourite hip openers. It can be an active pose, with muscular effort required to draw the knees apart and hold the feet together, but the addition of the strap creates a more comfortable and restful option.
Try it: Take a seat with your feet together and bent knees opened wide. Thread the strap around the back of your sacrum, over the top of your hip creases, and under the pinky toe blades of your feet, connecting the strap where you will easily be able to reach the free end to tighten the loop if required. Recline back onto a prop or the floor, aware of how the strap lengthens your sacrum, creating space for your low back. With the strap holding your feet close, you can allow your inner thighs to melt into the stretch. Relax for 10-20 slow and steady breaths before loosening the strap to release your legs.
9. Hand to Big Toe Pose (variation 1)
Supta Padangusthasana is arguably the most common place a strap is used during yoga class, but using the strap to reach our lifted foot can create tension in the chest and shoulders. Using the strap instead as a sling for both lifted foot and head eliminates much of the effort required, allowing us to more easily relax into the stretch. You’ll feel the benefits not just in your hamstrings, but in your upper body too.
Try it: Make a long loop with your strap and hook it over the ball of your right foot. Your left leg can remain bent or straighten. Ensure you can reach the free end of the strap so that you can adjust the length of the loop to cradle the back of your skull without you having to distort your spine or overly bend your right leg. Position the strap above your ears so that your head and neck can hang heavy with their relaxed weight gently lengthening the back of your right leg. Feel free to keep a slight bend in your right knee and subtle resistance up through the ball of your right foot, but allow your head, neck, chest and shoulders to melt. Relax for 10-15 slow and steady breaths before loosening the strap to swap sides.
10. Hand to Big Toe Pose (variation 2)
If you have more mobility in your hamstrings and find it easy to catch the lifted foot in Supta Padangusthasana, you can use the strap to fine-tune your alignment. As we straighten the lifted leg, our hip often hikes toward our ribcage, moving us away from the full potential of the hamstring stretch. In addition, we often forget the lower leg. This strapped variation harnesses the strength in the lower leg to help us keep the hips square. These are both very helpful patterns to in this pose, as well as in any standing hamstring stretches.
Try it: Make a long loop with your strap. Hook one end around the very top of your right thigh and the other end around the ball of your left foot. Ensure you can still reach the loose end of your strap so that you can tighten it to roll the right outer hip away from the right side ribs. As you extend the back of your right leg and catch your big toe, press out through the ball of your left foot, feeling how the strength of your left leg helps you to create more symmetry in your hips. Stay for 8-10 breaths before releasing your right foot to swap sides.
Hopefully now you’ve experienced how a prop can actually deepen your asana practice. Rather than being a fall-back for new students, smart use of props can create deeper and more nuanced understanding of a familiar pose. In my opinion, it’s this process of exploration and experimentation that builds a truly advanced asana practice.